Microsoft provides OSU College of Engineering students with access to the Azure Dev Tools portal. In this portal, students are able to download various programs, including:
- Access
- Project
- Visio
- Visual Studio
- Windows Server
- Windows operating system images (.iso files)
This page will instruct you on how to log into the portal, and navigate it in order to download and license the software you need.
Access to Portal and Software
- To get started, log into the portal by going here and clicking "Sign In".
- Sign in using your ONID email and password, and click "Next".
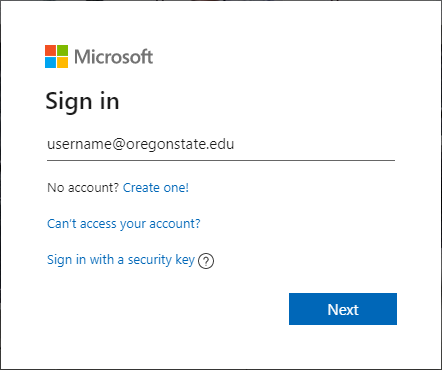
- When prompted, accept the DUO request.

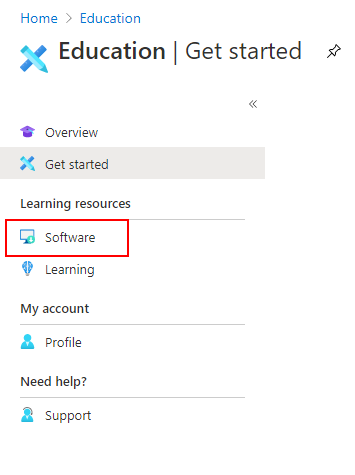
- You should be redirected to the Azure website, where you may be asked to verify your account information and/or accept the terms of service to continue.
- After you've finished the sign in process, you should arrive at the Azure portal. To download software, click "Software" in the left hand navigation bar.
- This page has a list of programs and other files that you can download. Do not use the blue search bar at the top of the page; this will search the entire site. Instead, use the search bar outlined below.
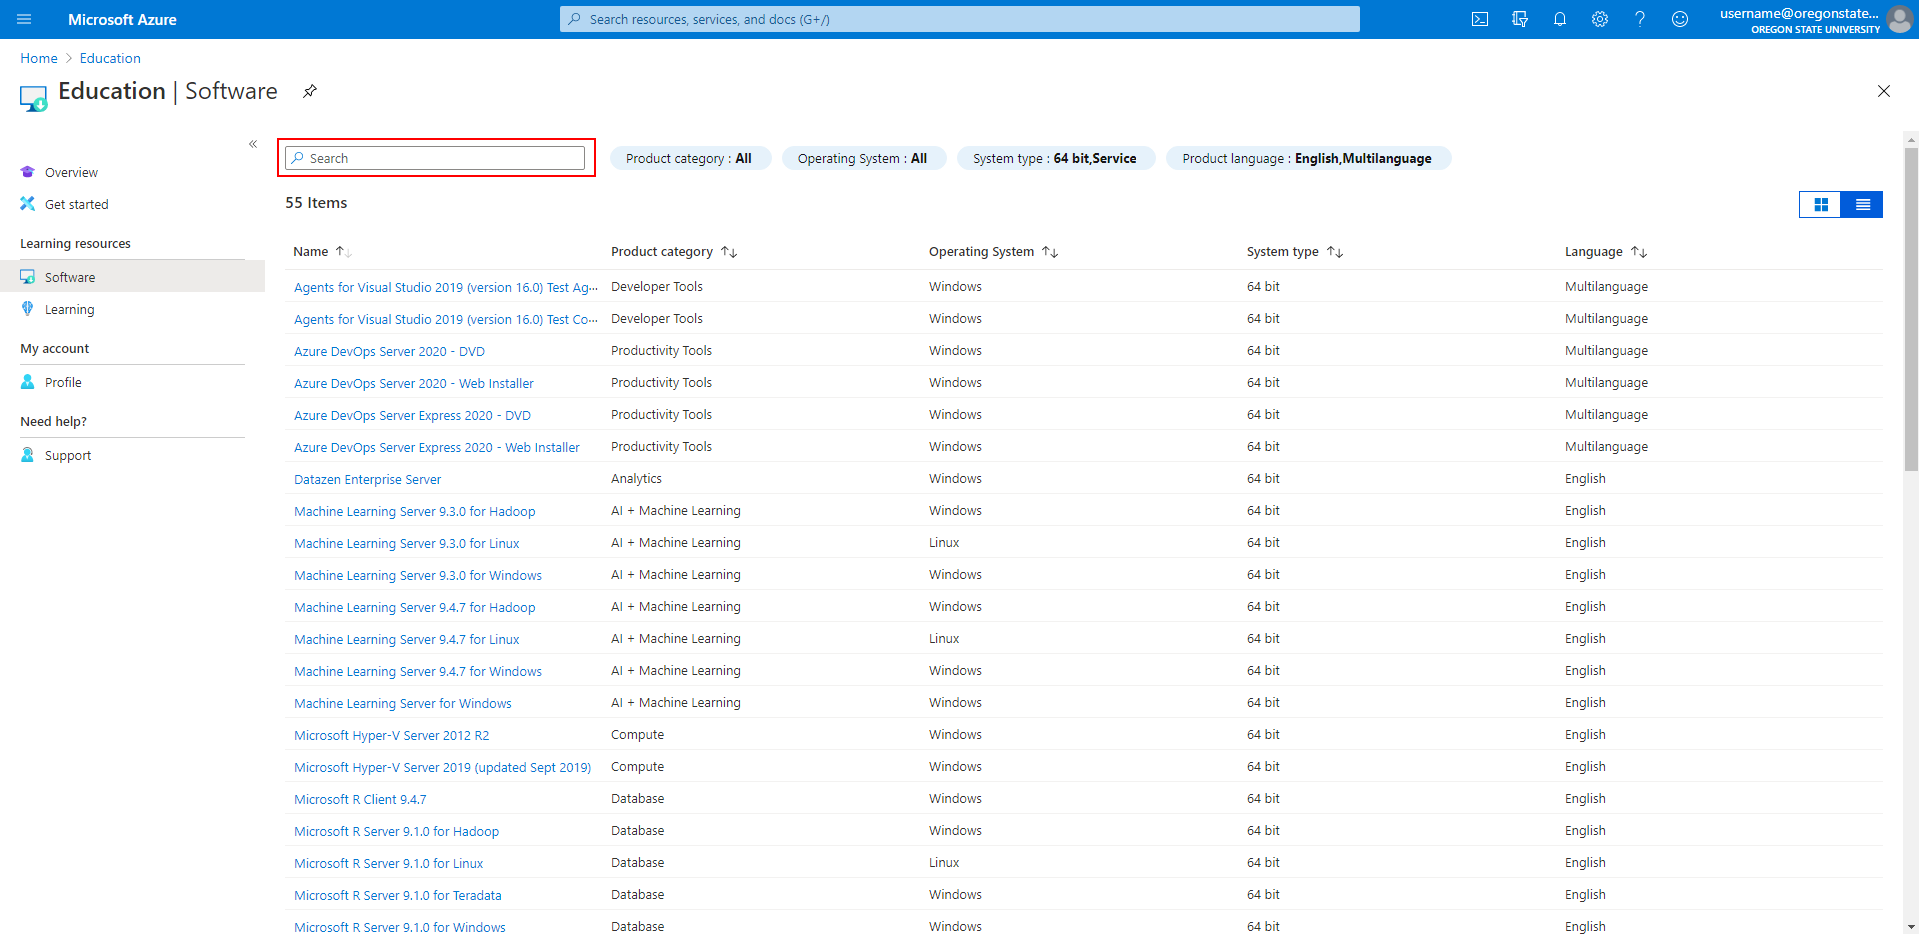
- You should now be able to locate and download the programs and files you need. For instructions on how to download programs and Windows disc image (ISO) files, see below.
Software Installation Guide (Visual Studio, Access, Project, etc.)
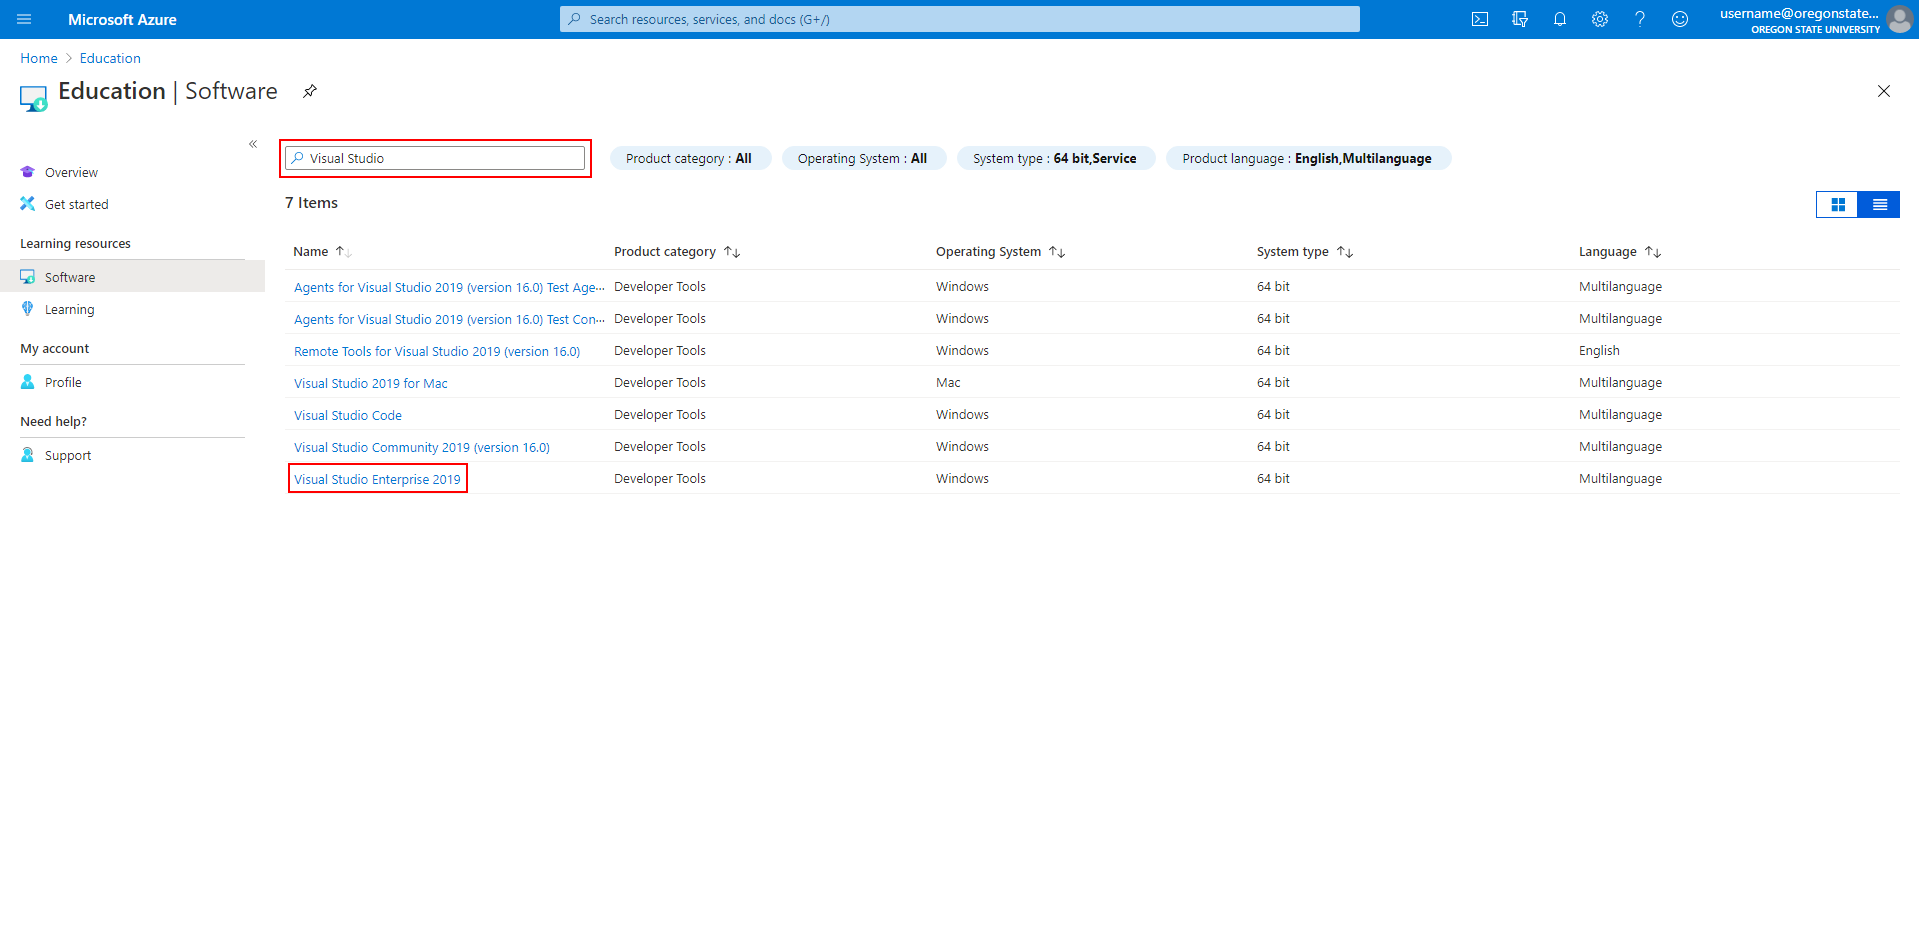
This guide will go through how to download and access a license key for a Microsoft program. This guide will use Visual Studio Enterprise 2019 as an example, but these steps should be virtually the same for all programs.
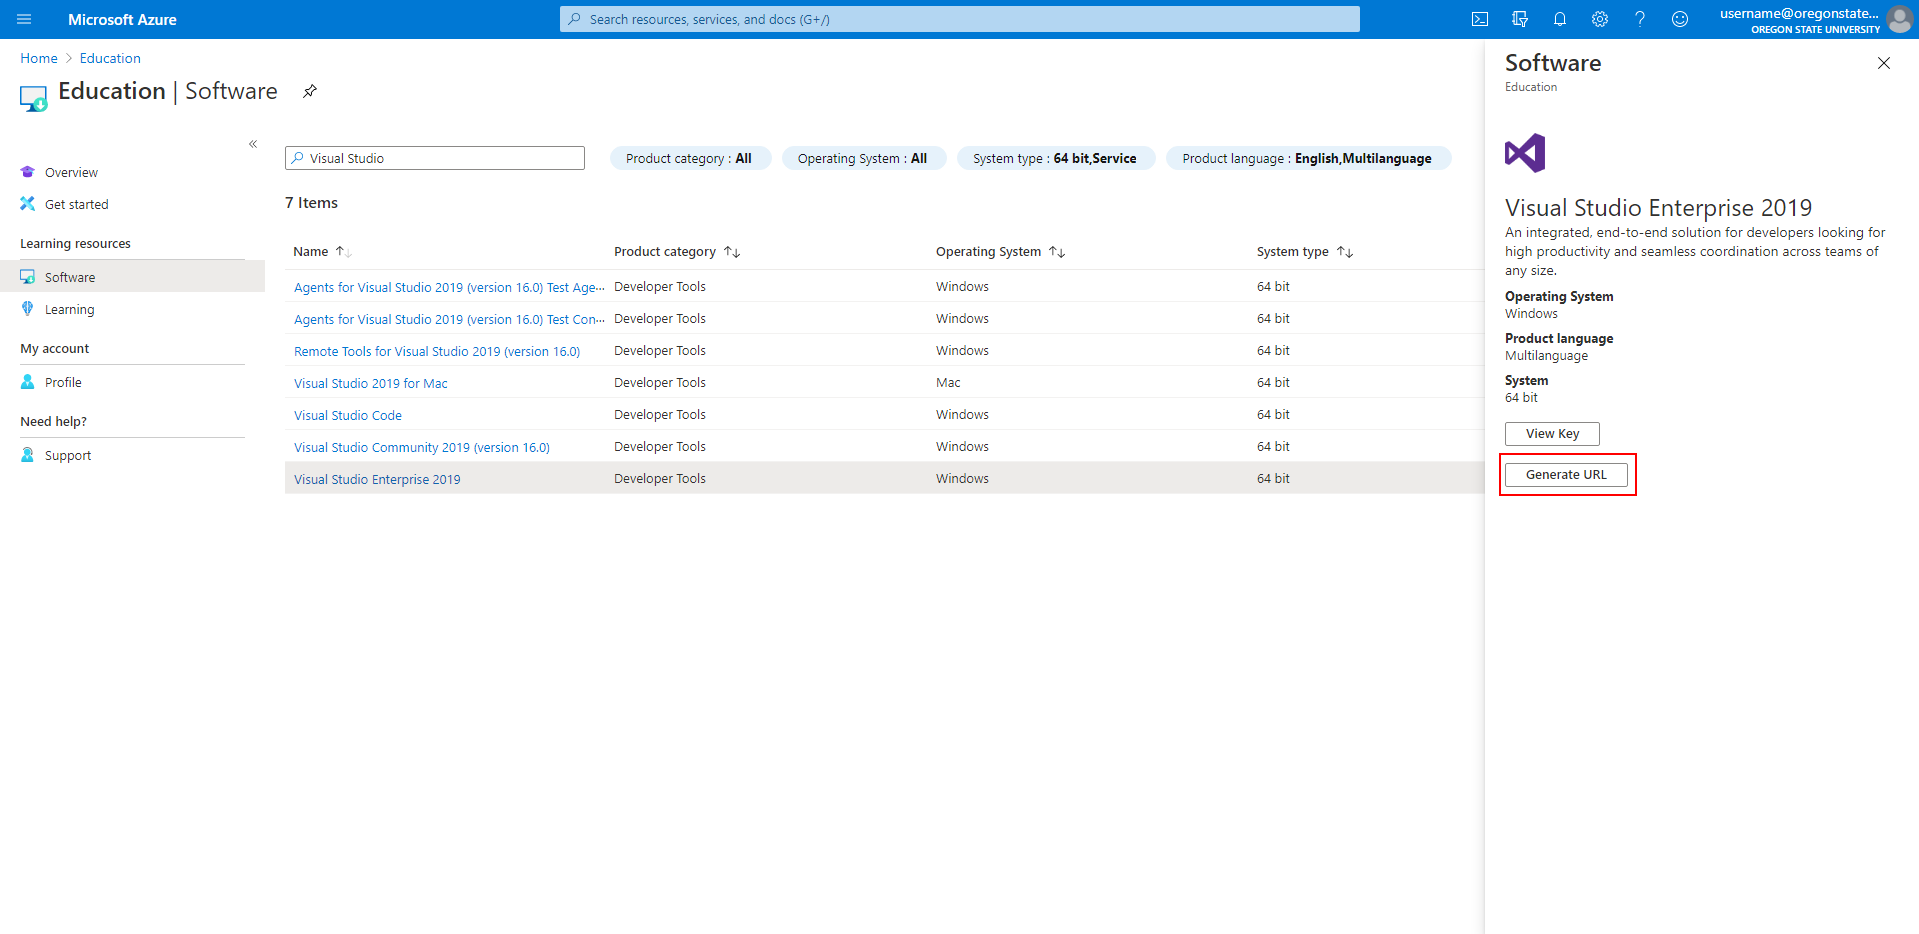
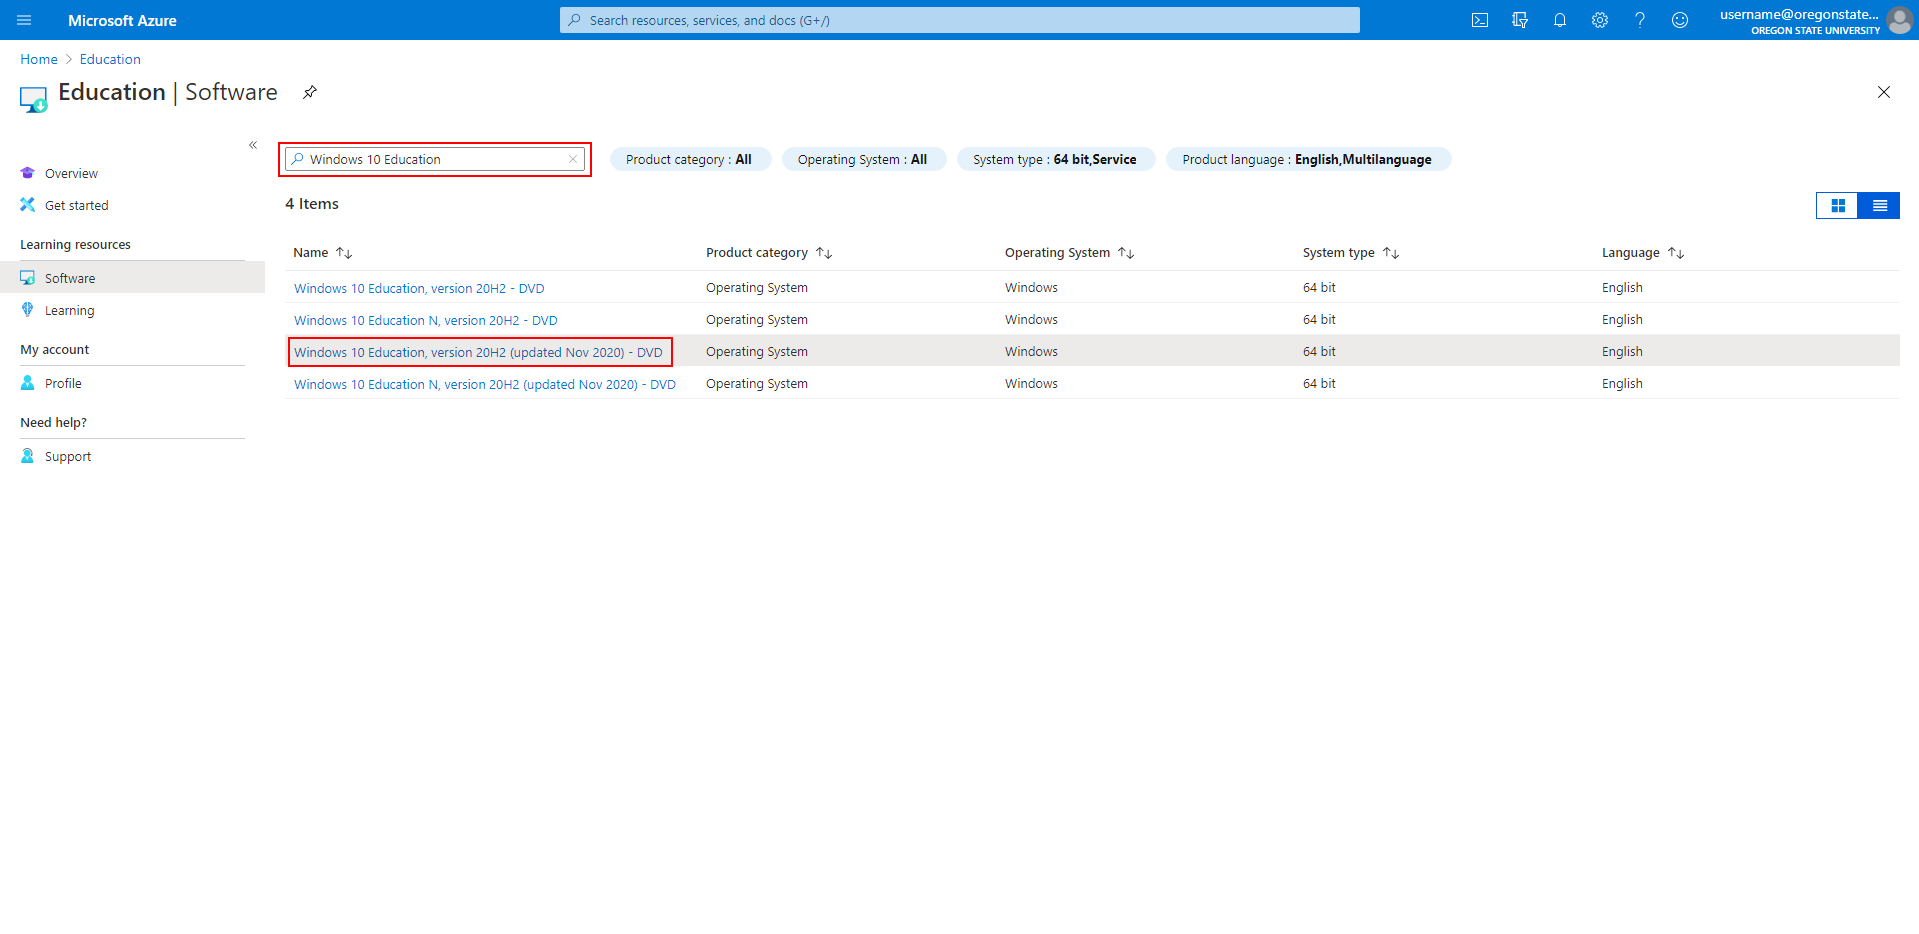
- Go to the Software page and search for your program. Click the version and name that matches what you'd like to download.
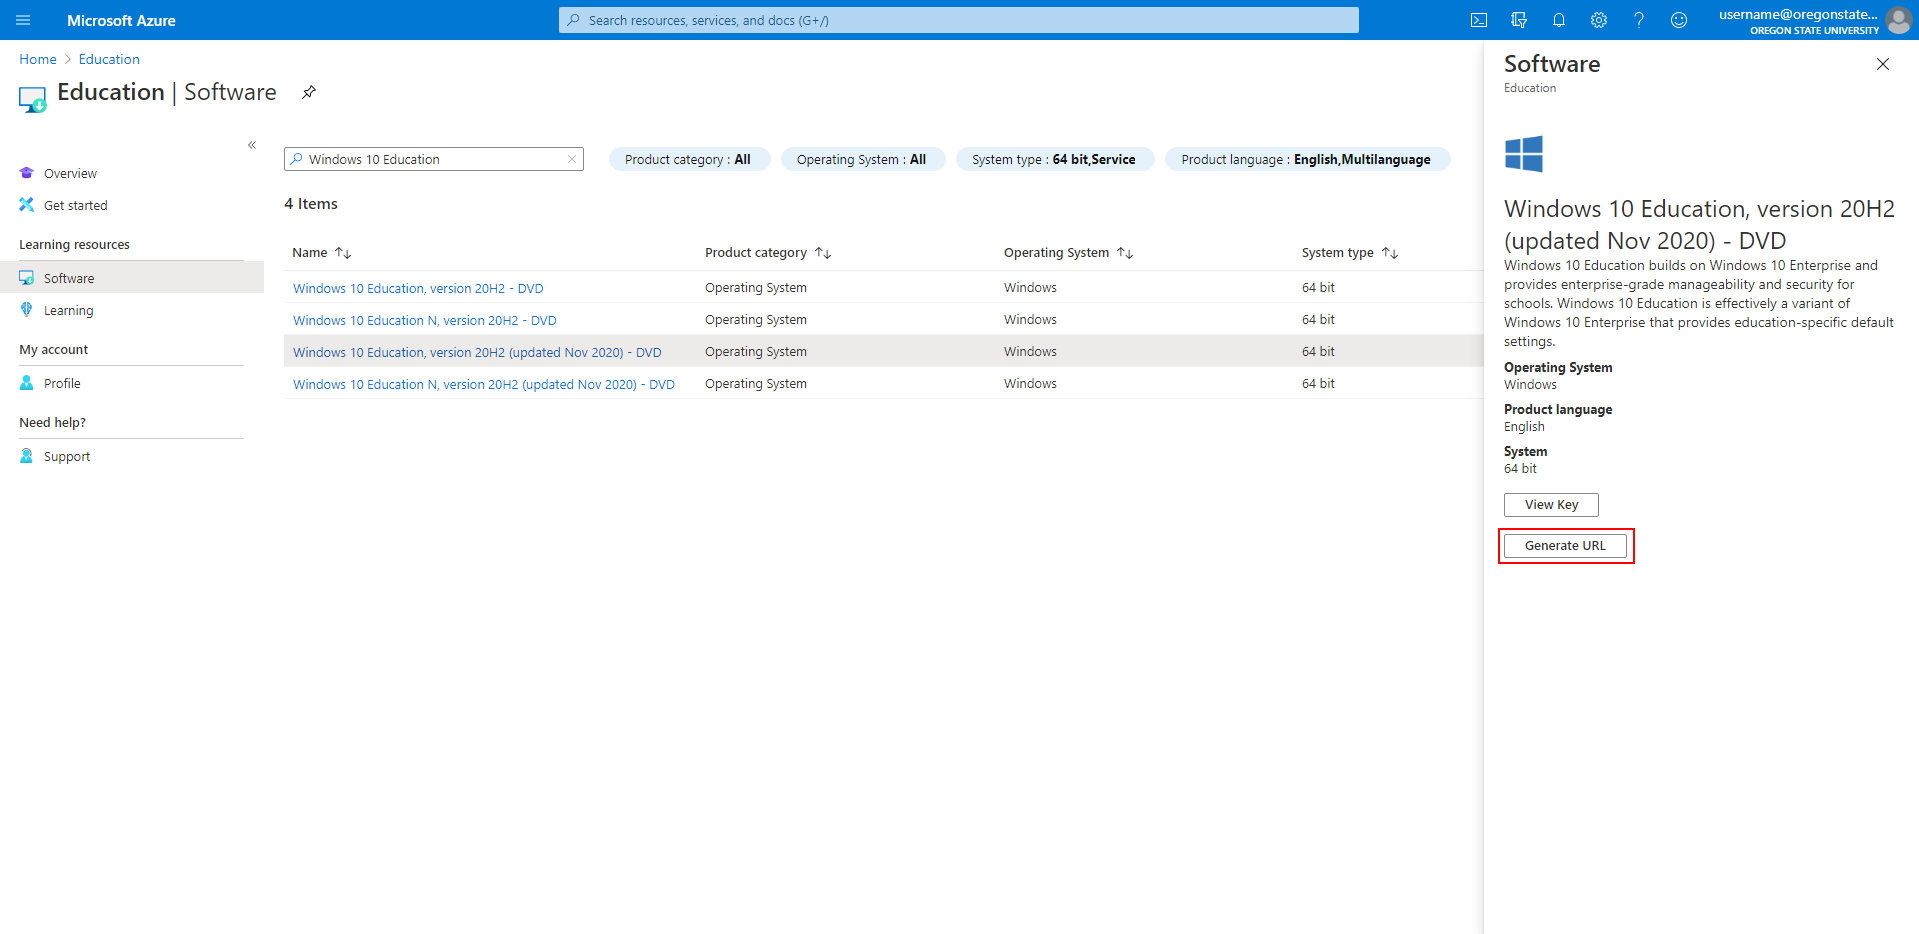
- A panel on the right hand side will pop up with information about the software. Click the "Generate URL" button to get the download link.
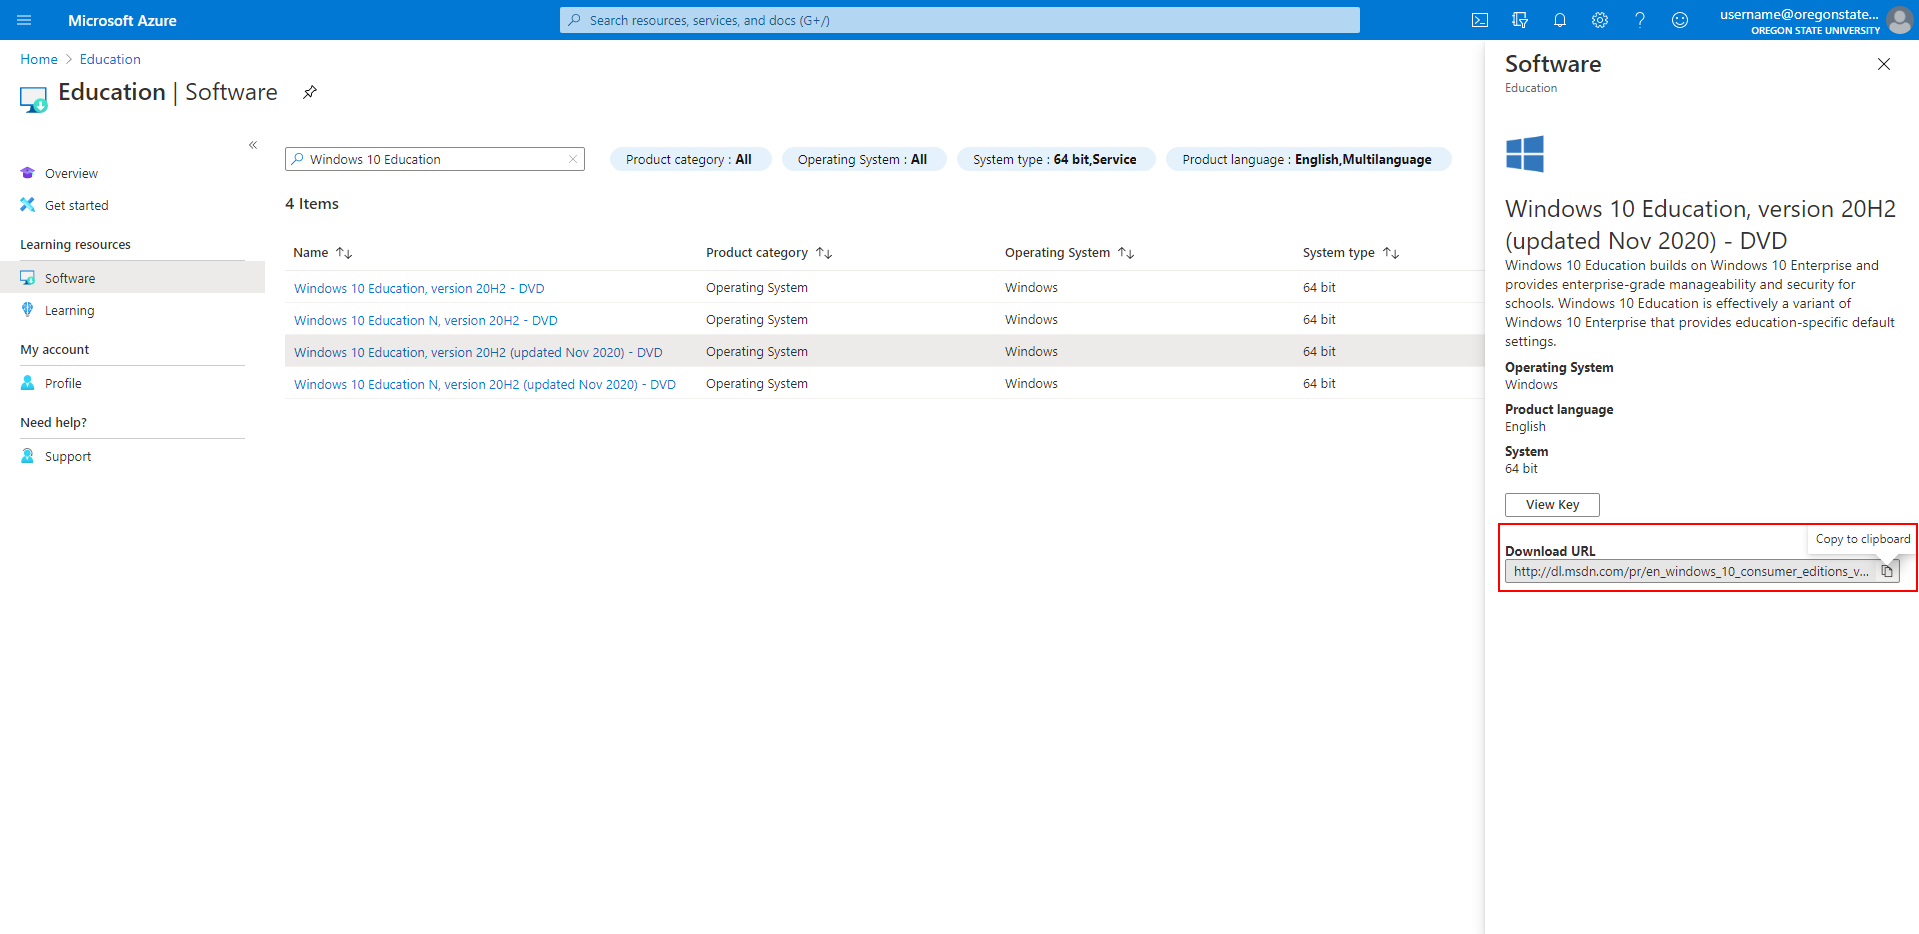
- Copy the download link and paste it in a new tab. The software should begin downloading.
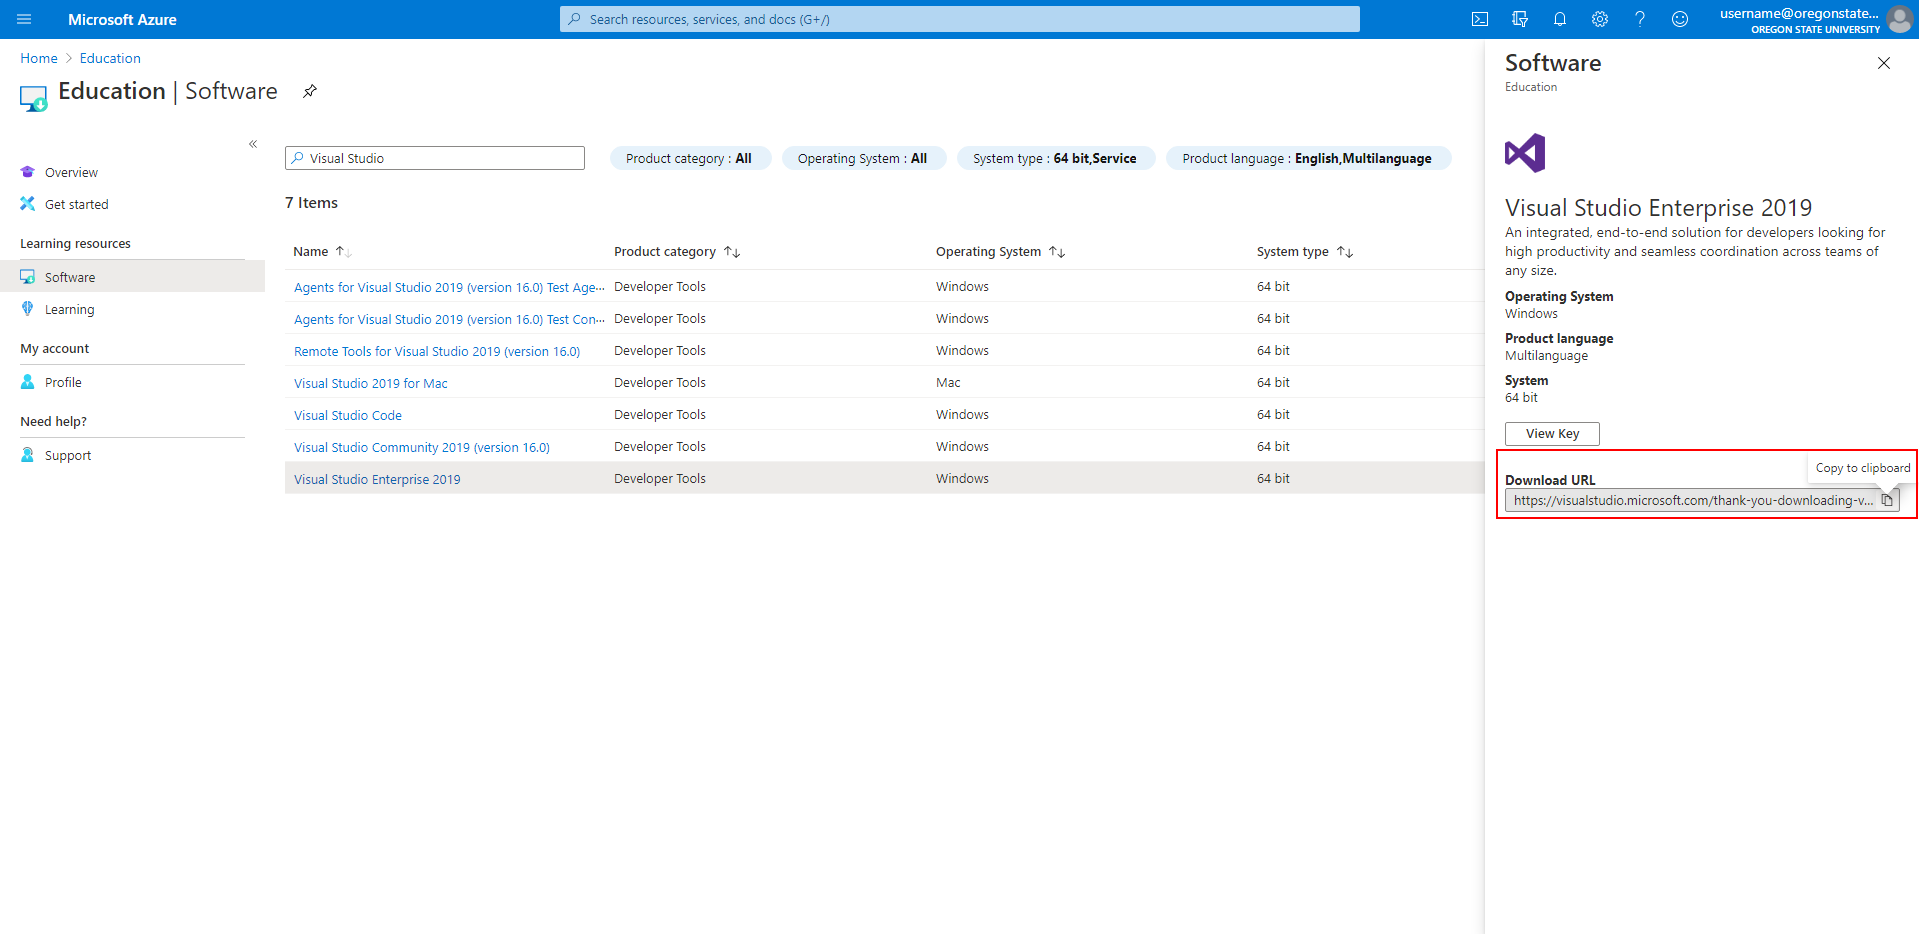
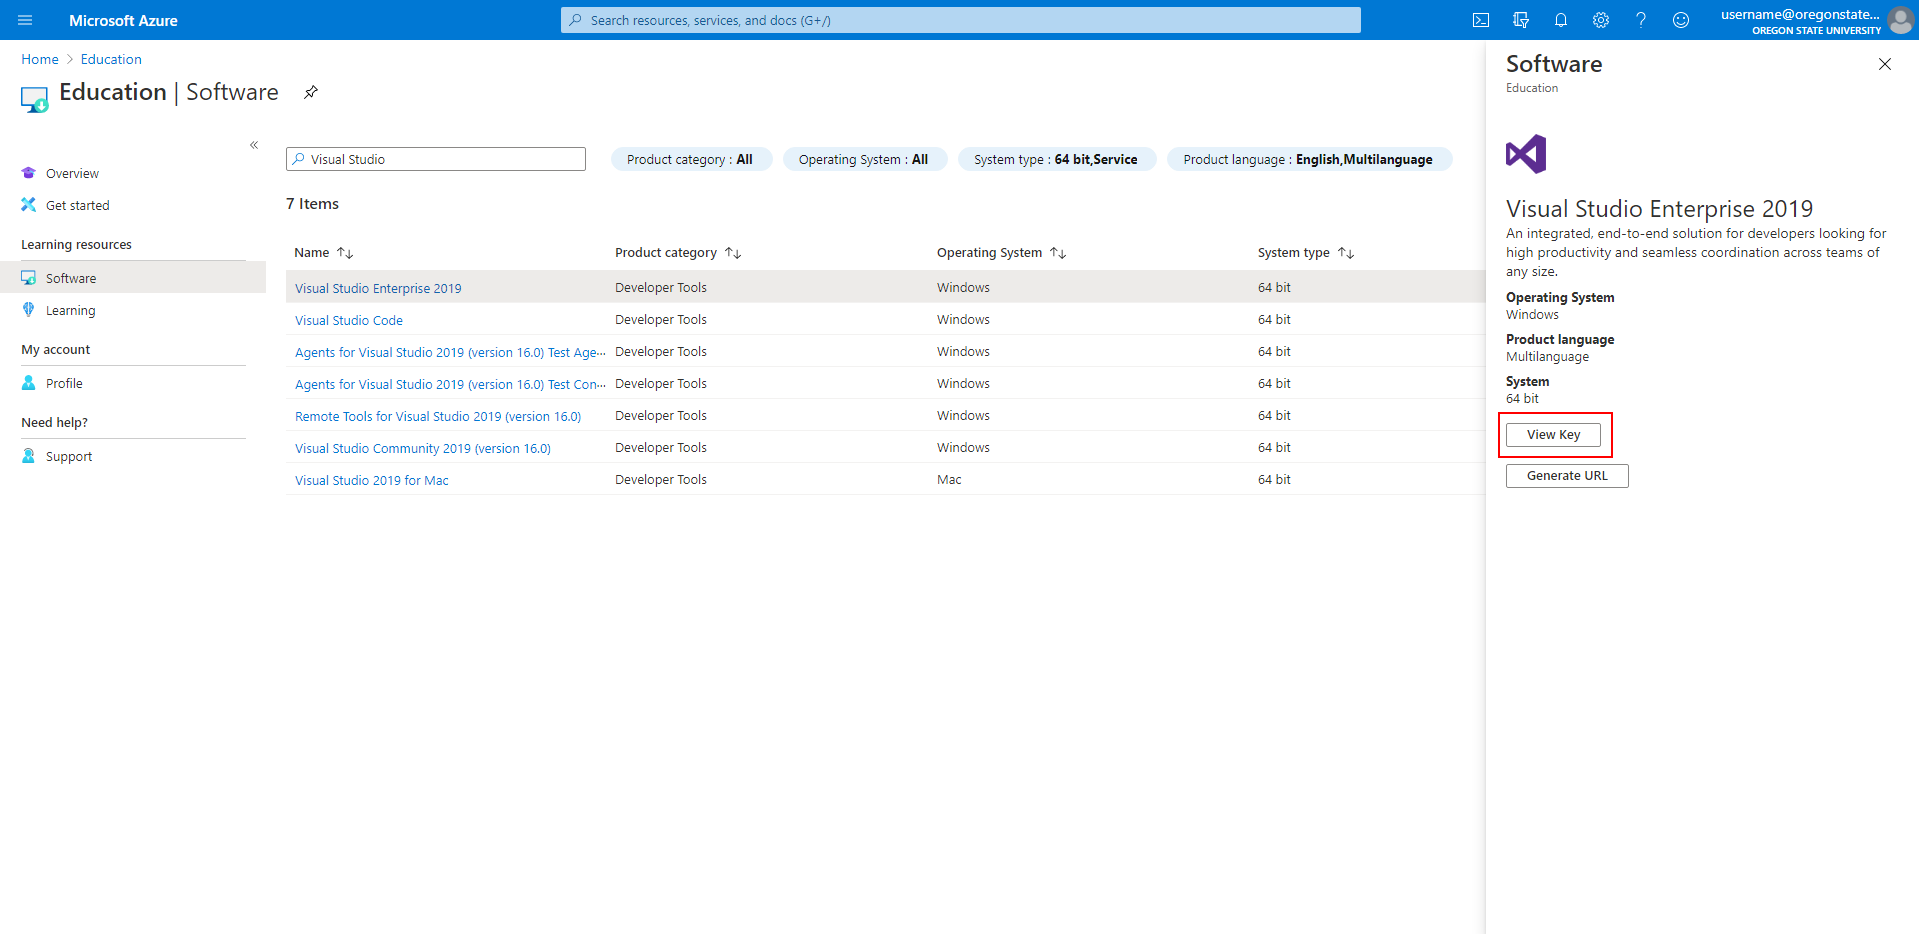
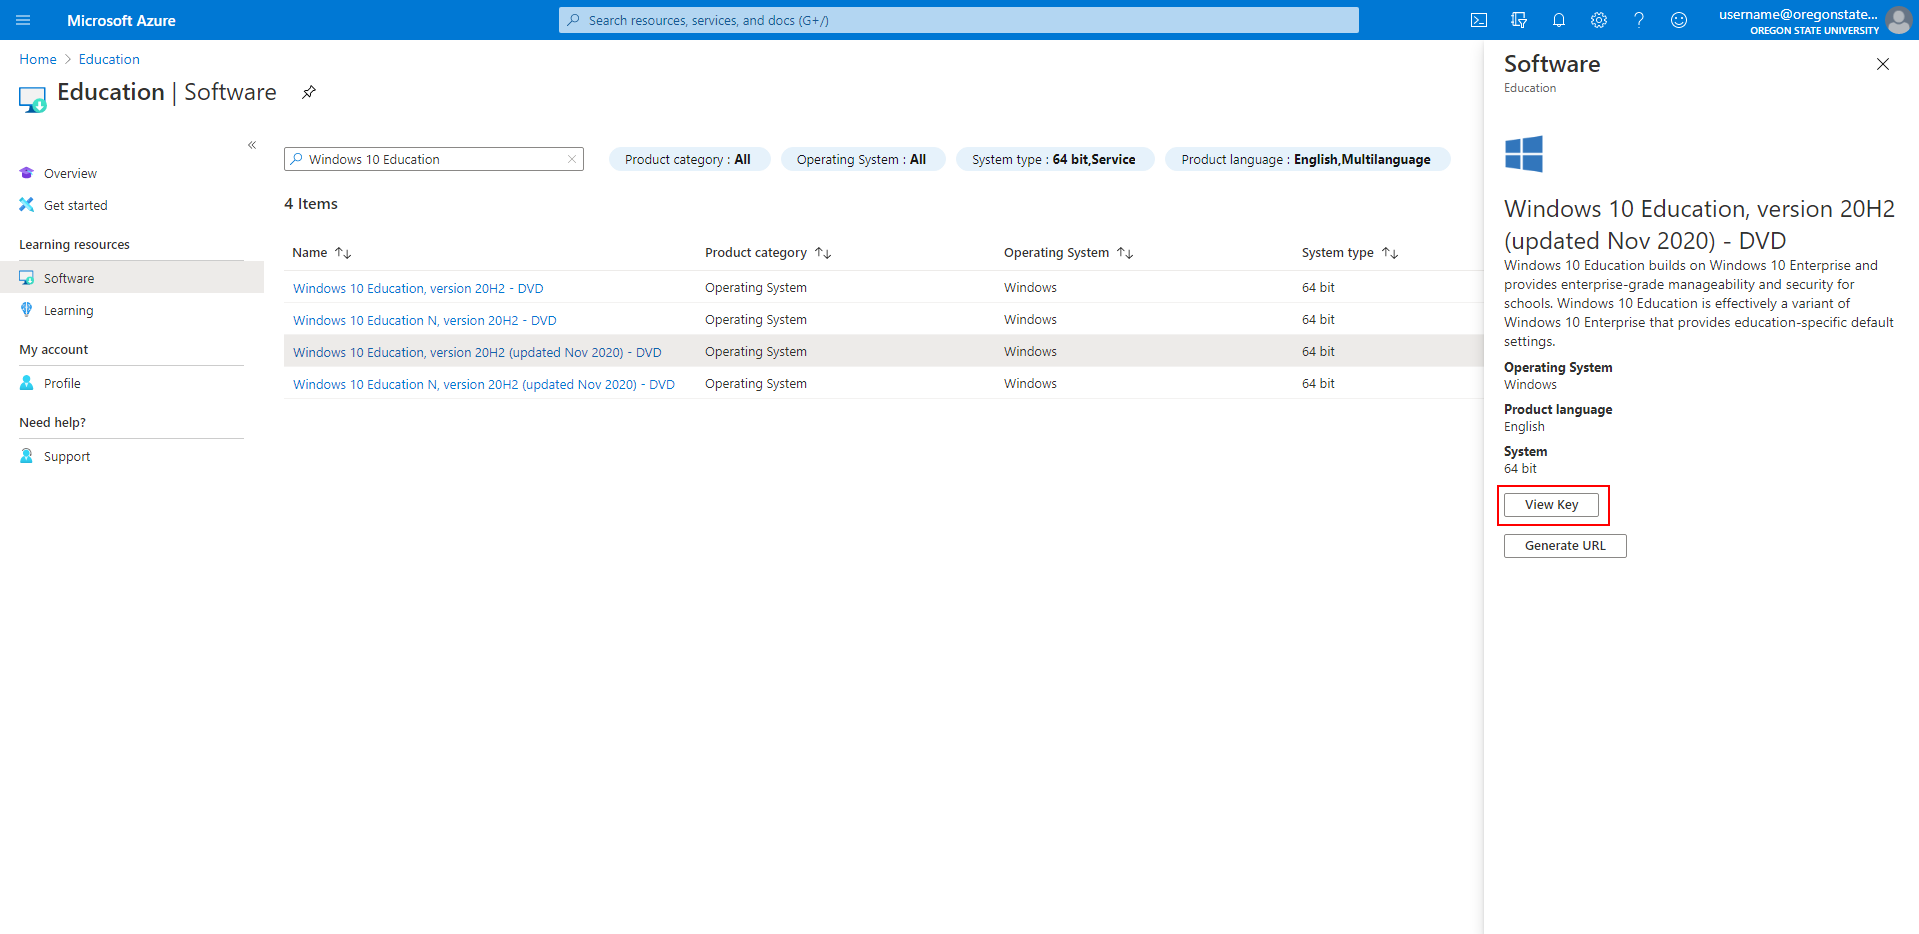
- Click "View Key" to obtain the license key for the software. You'll need this when installing the software so that you can activate it. This key will only work once, so do not share it. We recommend to email the key to yourself, take a picture of it, or write it down. This way, you can access it easily when you're prompted for it. You can always come back to this page and view the key again if necessary.
- After your program is installed, you'll need to figure out how to register it with your license key. For Visual Studio and most other programs, there will be a "Register Product" option under "Help".
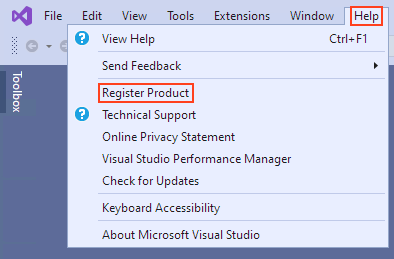
- You should be given the option to use a product or license key to register the software. Select this option, and enter the license key you received earlier from the Azure website. You should be good to go!
Windows Image Download Guide (for Virtual Machines)
If you wish to install the Windows operating system on a virtual machine or other computer, Azure provides OSU students with access to ISOs for various versions and editions of Windows. This process is very similar to the one above for downloading software, as it is the same interface for downloading and obtaining a license key. If you would still like to follow along, feel free. This guide will be using Windows 10 Education (Version 20H2) as an example. Windows 10 Education is the same as Windows 10 Pro, just with the removal of Cortana.
- Go to the Software page and search for the version of Windows you would like to download. Click the version once you find it.
- A panel on the right hand side will pop up with information about the software. Click the "Generate URL" button to get the download link.
- Copy the download link and paste it in a new tab. The .iso should begin downloading.
- Click "View Key" to obtain the activation key. We recommend to email the key to yourself, take a picture of it, or write it down. This way, you can access it easily when you're prompted for it. You can always come back to this page and view the key again if necessary.
- Once your Windows image file has finished downloading, proceed with installing it on the machine of your choice. When asked for the license key, copy in the one from the Azure page.